
Do I Need To Prime Drywall Patch Before Painting: There are a few things that you need to keep in mind when painting your drywall. One of which is to prime the drywall patch before painting. Priming the drywall patch will help to protect the wall from paint and eventual wear and tear.
If you don’t prime the drywall patch, the paint will just slide off of the wall and potentially cause damage. Make sure to read the instructions that come with your paint before starting your project to ensure that you’re doing everything correctly.
What is Priming?
Priming is the process of applying a coating or sealant to the surface of a material to improve its adhesion and protect it from the effects of paint and other materials. Priming can be helpful when painting over drywall, as it will help to keep the drywall from deteriorating and make the paint job easier.
What is the Benefit of Priming the Drywall Patch?
Priming the drywall patch will help to protect the wall from paint and eventual wear and tear. Additionally, priming will help to improve the adhesion of the paint to the wall. If you don’t prime the drywall patch, the paint will just slide off of the wall and potentially cause damage.
How to Prime a Drywall Patch
There are a few different ways that you can prime a drywall patch. One option is to use a water-based primer. This type of primer is easy to apply and doesn’t require any special tools or skills. You can also use an oil-based primer, which requires some special materials and equipment.
If you’re using a water-based primer, make sure to wait until the surface is completely dry before painting. If you’re using an oil-based primer, make sure to coat the entire surface of the drywall patch before painting.
Once you’ve primed the drywall patch, it’s ready for paint.
What is the Priming Process?
The priming process begins by cleaning the area that you will be priming. Next, you will apply a sealant or coating to the surface that you will be priming. After the sealant has been applied, you will then paint the area. Finally, you will apply a protective layer to the surface.
Do I Need to Prime the Drywall Patch Before Painting?
Priming the drywall patch is important for a number of reasons. Priming will help to protect the wall from paint and eventual wear and tear. Additionally, priming will help to improve the adhesion of the paint to the wall. If you don’t prime the drywall patch, the paint will just slide off of the wall and potentially cause damage.
Which Primer Should I Use?
There are a few different types of primers that you can use. One option is to use a water-based primer. This type of primer is easy to apply and doesn’t require any special tools or skills. Youcan also use an oil-based primer, which requires some special materials and equipment.
Once you’ve primed the drywall patch, it’s ready for paint.
Can I Paint Over a Primed Drywall Patch?
Yes, you can paint over a primed drywall patch. However, make sure to wait until the surface is completely dry before painting. If you’re using an oil-based primer, make sure to coat the entire surface of the drywall patch before painting.
After you’ve primed the drywall patch, it’s ready for paint.
What is the Best Way to Prime a Drywall Patch?
There are a few different ways that you can prime a drywall patch. One option is to use a water-based primer. This type of primer is easy to apply and doesn’t require any special tools or skills. You can also use the oil-based primer, which requires some special materials and equipment.
Once you’ve primed the drywall patch, it’s ready for paint.
Priming the drywall patch is a helpful process that can protect your wall from paint and other materials. Be sure to take care when priming the drywall patch, as it can make the painting process easier.
Do I need a primer after drywall repair?
If you have repaired drywall, it’s important to be careful with the primer that you use. The wrong primer could lead to a repair that doesn’t last. In this article, we’ll discuss the different types of primers, their uses, and how to choose the right one for your repair.
Types of Primers
There are three main types of primers: alkyd, lacquer, and epoxy.
Alkyd primers are the most common type, and they are made from a mixture of oil and pigments. They are good for covering large areas quickly, but they can be difficult to apply evenly.
Lacquer primers are made from a mixture of resins and pigments. They are more difficult to apply than alkyd primers, but they last longer and can be more precise.
Epoxy primers are the most durable type of primer, and they are made from two ingredients: resin and hardener. They require a special applicator tool to apply them correctly, but once they’re dry they’re virtually waterproof.
Each type of primer has its own advantages and disadvantages. For example, alkyd primers are good for covering large areas quickly, but they can be difficult to apply evenly. Lacquer primers last longer than alkyd primers but may not cover as much area, while epoxy primers are the most durable type of primer and require a special applicator tool to apply them correctly, but once they’re dry they’re virtually waterproof.
Which Primer to Use
The type of primer you use depends on the type of drywall you’re repairing. If the drywall is merely dirty, dusty, or wet, you can use alkyd primers. If the drywall is cracked or gouged, however, you’ll need to use a lacquer primer. If the drywall has been damaged by fire, you’ll need to use an epoxy primer.
To choose the right primer for your repair, take into account the type of drywall, the condition of the wall, and your level of experience. If in doubt, ask a professional.
How to Apply a Primer
Before you start painting or repairing drywall, be sure to clean and sand the surface. Then apply the primer using a painter’s spray gun or a roller. Be sure to apply the primer evenly and cover all the areas that need to be protected.
Once the primer is dry, you can start painting or repairing the drywall. Be sure to use a quality paint or drywall repair kit that contains the correct type of primer and finishing supplies.
What is the Purpose of a Primer?
A primer is a sealant that’s used to protect the surface that it’s applied to. Primers are often used in the construction and repair industries. They’re used to protect wood floors, walls, and ceilings from moisture and other damage.
Primers are also used in the home to protect wood finishes from water damage. If you have repaired drywall, be sure to use a primer that’s designed for this type of repair.
What Are the Different Types of Primers?
There are two main types of primers: oil-based and water-based.
Oil-based primers are the most common type. They are applied with a brush or a spray gun. They are most effective when used on drywall, plaster, and fiberglass.
Water-based primers are less common. They are applied with a spray gun or a sponge. They are most effective when used on wood, masonry, and metal.
What are the Uses of a Primer?
Primers are used to protect the surface that they’re applied to. Primers are also used to reduce the amount of time that it takes for a repair to dry.
What are the Advantages of Using a Primer?
The main advantage of using a primer is that it protects the surface that it’s applied to. Primers are also good for reducing the amount of time that it takes for a repair to dry.
What are the Disadvantages of Using a Primer?
Primers can be difficult to apply evenly. They can also take more time to dry than regular paint or wallpaper.
How Do I Choose the Right Primer for My Repair?
There are a few things that you need to consider when choosing a primer for your repair. The type of surface that you’re repairing, the type of finish that’s on the surface, and the amount of time that you have to finish the repair.
Primers are important for the protection of the surface that they’re applied to. Make sure to use the right primer for the type of surface that you’re repairing.
How do you paint over patched drywall?
If you are like most homeowners, you’ve probably patched drywall in the past – and maybe even done it a few times. But have you ever stopped to think about how you do it? Drywall is a very sensitive material, and when it’s not handled correctly, it can cause a lot of damage.
The best way to patch drywall is to use a proper adhesive and a joint compound. First, you’ll need the adhesive. If you’re using a regular old T-bar Happiness, then you can just use water to wet the surface of the drywall and press it against the hole. If you’re using an electric saw, then you’ll need to use a special blade to cut the T-bar Happiness into small pieces that will adhere to the drywall.
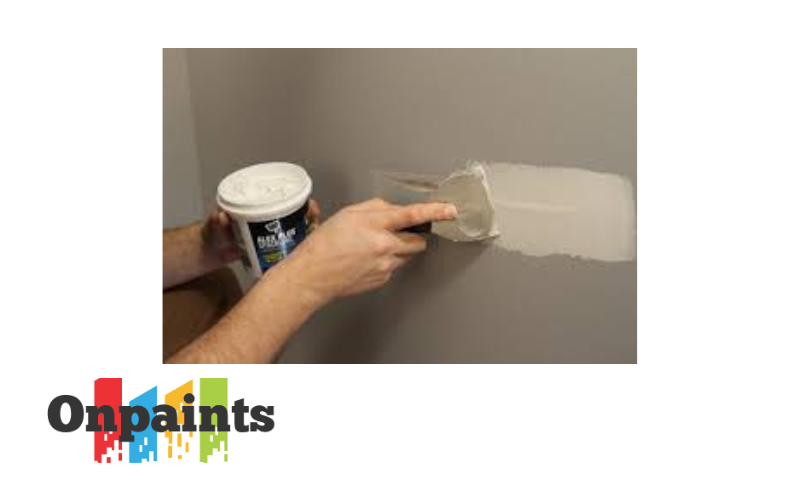
Once you’ve got the adhesive applied, you’ll need to mix up some joint compound and spread it over the entire patch. Make sure that all of the seams are covered and that there are no air bubbles in the compound. Once it’s mixed together, start pressing down on the patch with your hands or a heavy object until it’s firmly attached to the drywall.
If you’re painting over a patched drywall, then you’ll need to take a few extra steps. First, make sure that you clean the area around the hole in the drywall very well. Next, use a putty knife to remove any old paint or wallpaper from the hole. Finally, cover the hole with new drywall and adhesive and start painting.
How do you prep the drywall?
You need to prepare the drywall before you paint it so that the paint will stick to it. There are a few things you can do to prep the drywall:
-remove the paint
-remove the paper
-remove the nails
-remove the caulking
-remove the spackle
-clean the area
Once you have cleaned the area, you will need to mix up some joint compound and spread it over the entire patch. Make sure that all of the seams are covered and that there are no air bubbles in the compound. Once it’s mixed together, start pressing down on the patch with your hands or a heavy object until it’s firmly attached to the drywall.
If you’re painting over a patched drywall, then you’ll need to take a few extra steps. First, make sure that you clean the area around the hole in the drywall very well. Next, use a putty knife to remove any old paint or wallpaper from the hole. Finally, cover the hole with new drywall and adhesive and start painting.
Here are the questions we will be answering:
What is the most common type of drywall?
Drywall is a type of construction paper that is used to cover walls and ceilings. Its a very sensitive material, and can be damaged easily if not handled correctly.
How do you patch drywall?
There are a few different ways to patch drywall – and they all have their pros and cons. The most common way to patch drywall is to use a mix of sand, cement, and water. You wet the paper, add the ingredients, and press it into the hole. This method is easy and doesn’t require any special tools or skills. But it can be time-consuming, and if the hole is big or the damage is extensive, it may not be enough.
Another popular way to patch drywall is with foam insulation. You cut a piece of foam the same size as the hole, cover it in cement, and wet the foam. Then you press it into the hole until its secure. This method is quick and easy, but it can be difficult to get a good seal around the edges of the hole. It also requires some specialized tools – such as an electric drill – that most homeowners may not have on hand.
The last method for patching drywall is with fiberglass tape. You first cover the area with plastic wrap or paper towel to protect your flooring or furniture surfaces, then lay down fiberglass tape in a straight line across the area. This tape is very durable and won’t rip or tear like other types of tape does. But again – because it’s so durable – mistakes can easily be made when applying it, which can lead to more damage than if you had used another type of tape.
How do you paint over patched drywall?
There are a few different ways to paint over patched drywall, and each one has its own benefits and drawbacks. We’ll go over each one below:
-Paint Over Patch
This is the most common method, and it involves painting over the patch with a new layer of drywall. This is the least damaging option, but it can be time-consuming and requires a lot of prep work.
-Stripping and Pouring
This method involves stripping the old drywall off the wall, and then pouring a new layer of drywall over the patch. This is the fastest option, but it can be less than ideal if the patch is large or complex.
-Reinforcing the Patch
This is a more permanent solution, and involves reinforcing the patch with a new piece of drywall. This is the most damaging option, and should only be used if there is no other option.
If you are looking to paint over a patched drywall, be sure to read our guide first. It will walk you through the steps necessary to get the job done correctly.
How do you prepare a patched wall for painting?
Painting a patched wall can be a daunting task, but by following these simple steps, you will be well on your way to a successful painting project.
- Remove all existing paint with a paint scraper or a wire brush. If the wall is textured, be sure to remove any old coatings with a sandpaper block and then clean the surface with rubbing alcohol.
- Apply an even coat of primer to the entire surface. This will help the new paint stick to the wall and protect it from chipping.
- Choose your paint color and prepare your brush by mixing the color with water as needed. Be sure to wet the bristles of your brush before applying paint to give yourself a smooth, even finish.
- Begin painting in one corner and work your way around the circumference of the wall, allowing each layer of paint to dry before adding another. Remember not to overlap joints or drips; this will create bumps in your finish that will be hard to smooth out later on.
- When you’re finished, use a clean cloth or a piece of paper towel to gently buff away any fingerprints or stray paint molecules from the surface.
What is Needed to Prepare a Patched Wall for Painting?
In order to prepare a patched wall for painting, you will need the following:
-A wall that is patched
-Paint
-A brush
-Paint thinner
-Stickers orDecals
-Paint tape
-Paintbrush
-Tape measure
-Ruler
-Pencil
-Cordless drill
-1 inch spade bit
-Circular saw
-Handsaw
-High-grit sandpaper
-Rubber gloves
-Safety glasses.
What are the Steps Necessary to Prepare a Patched Wall for Painting?
The following are the steps necessary to prepare a patched wall for painting:
-Measure the length, width and height of the wall you wish to paint
– Determine the color of paint you will be using
– Remove any existing paint or wallpaper from the wall
– Cut the desired size of stickers or decals
– Apply the stickers or decals to the desired area of the wall
– Apply a thin layer of paint to the stickers or decals
– Allow the paint to dry
– Apply a second thin layer of paint to the stickers or decals
– Allow the paint to dry
– Apply a coat of paint to the entire wall
– Allow the wall to dry
– Hang a piece of painter’s tape at the top and bottom of the wall
– Paint the wall using the desired color
– Remove the painter’s tape
– Remove the stickers or decals
– Finish Painting the Wall
What is the Best Way to Brush Paint Over a Patched Wall?
The best way to brush paint over a patched wall is to use a brush that is large enough to cover the entire area to be painted. Be sure to wet the bristles of the brush before applying paint to give yourself a smooth, even finish.
How Do You Tape a Wall Before Painting It?
Before taping a wall, you will need to measure and cut the desired amount of painter’s tape. Be sure to apply the tape to the drywall so that it is firmly in place and does not move during painting.
How Do You Paint Over a Wall That Has Been Taped?
To paint over a wall that has been taped, you will first need to remove the painter’s tape. Be sure to use a clean cloth or a piece of paper toweling to remove any fingerprints or stray paint molecules from the surface.
What is the Best Way to Sand a Wall Before Painting It?
The best way to sand a wall before painting it is to use high-grit sandpaper. Be sure to wet the sandpaper before rubbing it against the surface of the wall for an even finish.
How Do You Paint Over a Wall That is Taped?
When painting over a taped wall, you will need to remove the painter’s tape first.
Why Is It Important to Paint a Wall After It is Dried?
By painting a wall after it is dry, you will avoid any water spots or brushstrokes.